Hello, VideoRay

Balefire Basic

Balefire Basic

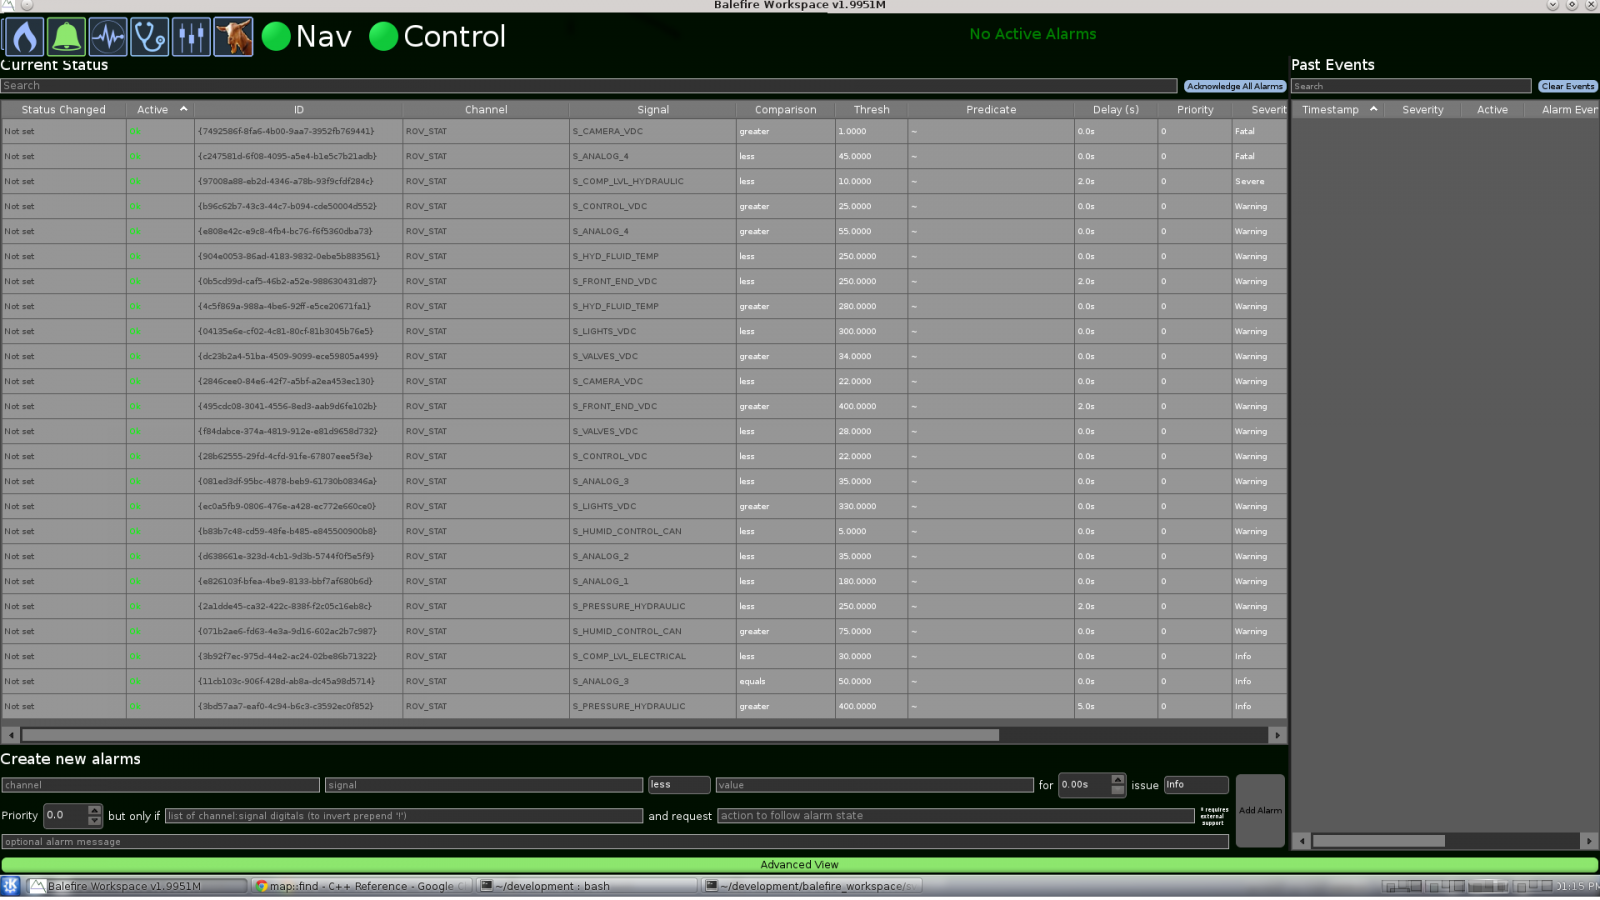
Alarm Channel Descriptions

Alarm Field Name

Description

ID object

An auto generated field by process client.

Input

The command channel for the input

Transform

The condition for the alarm, less than, equals greater than

Priority

The alarm priority is set with the toggle arrows in advanced view.

Severity

Clear Events

The Clear Events button clears the alarm history from the “Past Events” pane on the Alarm Manager. This button will only clear alarms that have triggered and returned to a non-alarm state. It will NOT clear currently active alarms. The “Past Events” pane will repopulate as new alarms are triggered.

Acknowledging Alarms

When alarms have been registered by the operator, they can be acknowledged. Acknowledging an alarm will not make the alarm go away, rather it is just an indication to the system that the operator has taken notice of an alarm and is aware that is currently in an alarm state. If the acknowledged alarms are still “alarming”, they will reappear even after their acknowledgment. If the alarm does not return after being acknowledged, that means it is no longer in an alarm state. The operator may choose to acknowledge all active alarms or smaller set of alarms using the following two buttons.

Adding an Alarm

To create an alarm, first determine what signal is to be monitored. Once the signal is specified, the operator can populate the channel, signal, comparator, trigger time, and alarm severity fields. After filling in these fields, simply click add alarm to place it into the alarm manager's queue.

In the illustrated example, the unix_time signal on the OPENINS_NAV_SOLUTION channel is set to trigger a Severe warning to the operator if the timestamp is greater than 1500 seconds for a trigger time of 0 seconds.

Alarm Manager Buttons

The Alarm Manager has four buttons across the top of the page that allow the operator to create and edit the alarms, save alarms, and restore alarms.

Button

Description

Enable Editing

Allows the operator to create and edit alarms.

Save Alarms

Alarm Manager

Alarms alert the operator when a signal crosses a user-defined warning threshold. The Alarm Manager is used to create and manage these alarms. Alarms can be placed on any signal, and their severity can be set to reflect the severity of the situation. On the alarm screen, the current status of all alarms are displayed in the left column and past events are displayed on the right.

Waypoint Includes Z

During the waypoint route execution, the vehicle will try to achieve each waypoint until the waypoint tolerance is met. Selecting "Waypoint Includes Z" enforces the vertical component of the waypoint is met before considering the waypoint achieved.

Locking Waypoints in Place

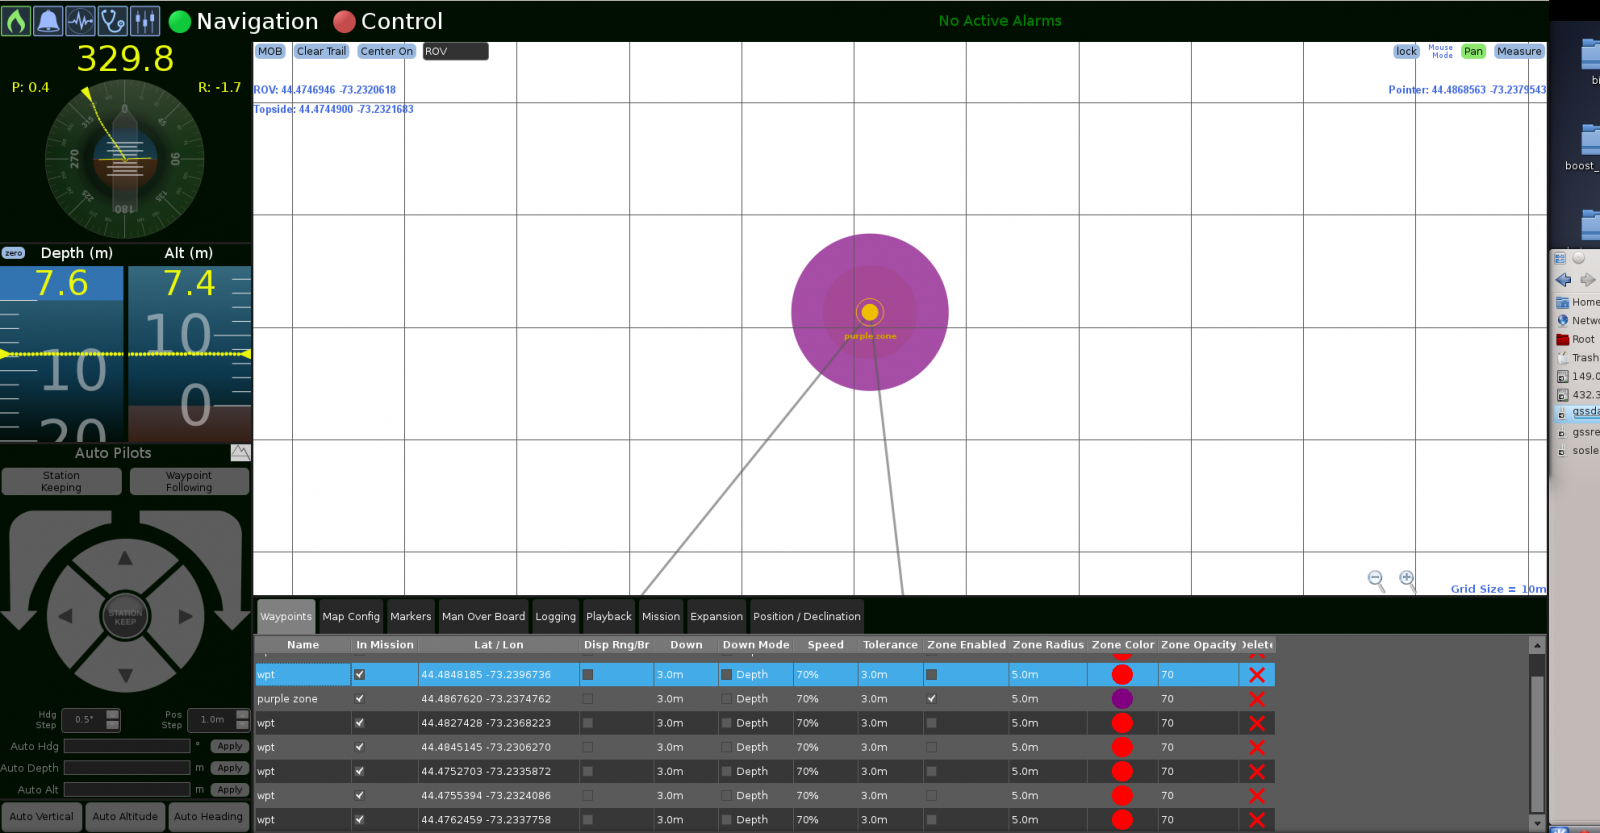
If you want to be sure your waypoints do not get moved accidentally, simply click the Lock button on the upper right portion of the screen. This will secure the present setting of the waypoints and prevent them from being dragged with the mouse. If you need to unlock them, click the Lock button again to disable it.

Safety Zone Visibility

By default, the map grid may not show the safety area around your waypoint. Click on the map and use your mouse wheel to zoom in by rolling it forward to change the map size. You can also click the magnifying glass on the bottom right side of the screen. The grid size will display in the lower right corner.

As your grid size approaches the scale of your safety zone, the colored circle will appear.

Pages

Subscribe to RSS - Balefire Basic