Mission Specialist Defender
Using Auto Modes
Version:  A-1.00.00

Page 1 of 18
Auto Modes Overview

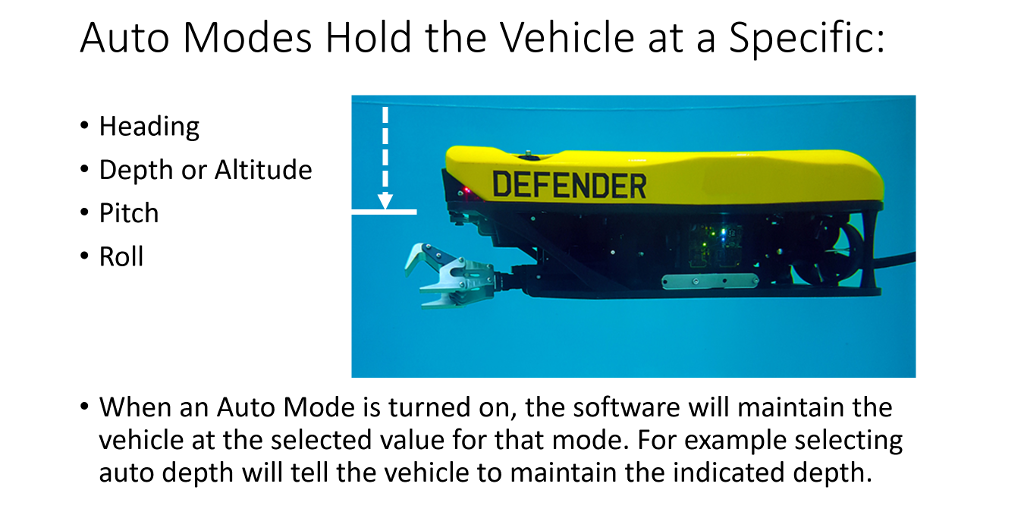
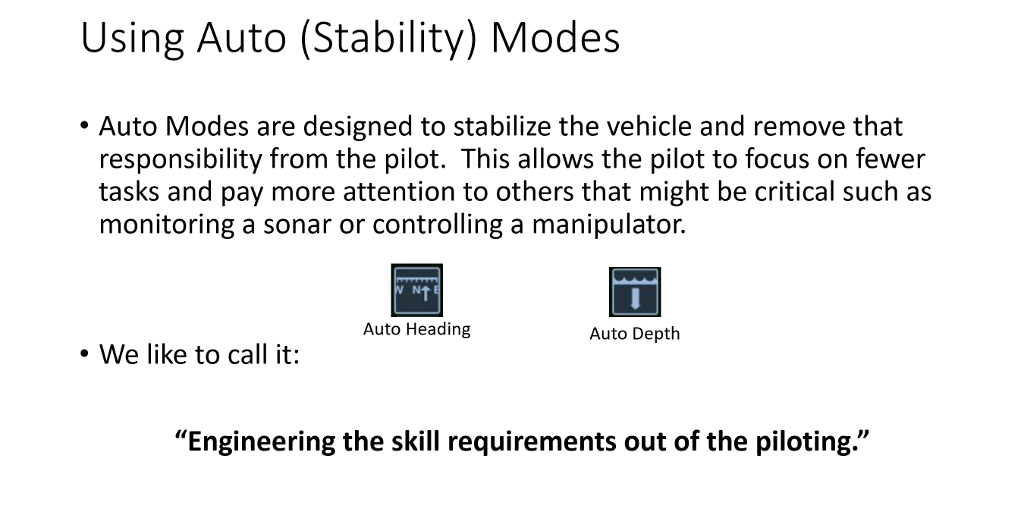
Auto Modes are designed to stabilize the vehicle and remove that responsibility from the Pilot. This allows the pilot to focus on fewer tasks and pay more attention to others that might be critical such as monitoring a sonar or controlling a manipulator.

We like to call it: "Engineering the skill requirements out of the piloting"

Mission Specialist Defender
Using Auto Modes
Version:  A-1.00.00

Page 2 of 18
Auto Modes

Auto modes hold the vehicle at a specific heading, depth or altitude, pitch or roll.

When an auto mode is turned on, the software will maintain the vehicle at the selected value for that mode. For example selecting auto depth will tell the vehicle to maintain the indicated depth.

Mission Specialist Defender
Using Auto Modes
Version:  A-1.00.00

Page 3 of 18
Activating an Auto Mode

Auto modes are engaged or disengaged from the control bar on the left of the screen.

When an auto mode is off its button is green, when an auto mode is on its button is blue.

An auto mode may be unavailable. For example, if there is no altitude data, the Auto Altitude Mode is disabled.

The Video Ray IP65 hand controller has a button dedicated to turning off all Auto modes in an emergency.

Mission Specialist Defender
Using Auto Modes
Version:  A-1.00.00

Page 4 of 18
The "Set Point"

When an auto mode is engaged, a set point is created. The set point is the desired value for the vehicle to maintain. The set point is initialized at the current value for that Mode.

Examples:

  • If the vehicles current heading is 076, and the Auto heading is turned on, the set value for the heading will be 076.
  • If the vehicle’s current depth is 35m, and auto depth is turned on, the set point for the depth will be 35m.

Exceptions, the set points for the auto pitch and auto roll are always set to zero when first turned on.

Mission Specialist Defender
Using Auto Modes
Version:  A-1.00.00

Page 5 of 18
Heading, Depth/Altitude Indicators

For Auto Heading, Auto depth and Auto Altitude, the set point is displayed as a value and as a triangular graphic indicator on the ribbon compass or depth scale respectively.

Check the graphics on the above slide for an example of how this will be represented on the screen.

Mission Specialist Defender
Using Auto Modes
Version:  A-1.00.00

Page 6 of 18
Pitch, Roll Indicators

For Auto Pitch and Auto Roll, only the values are displayed, as illustrated in the graphic in the slide above.

You will note that the current pitch and roll are displayed in Black, while the Pitch and roll set points are displayed in white.

Mission Specialist Defender
Using Auto Modes
Version:  A-1.00.00

Page 7 of 18
Manual Control in Auto Mode

Operators can change the set point effortlessly. Simply move the desired input as if the vehicle is in manual control.

But realize, in manual mode, your inputs st the thrust proportionally: more stick equals more thrust.

With Auto Modes, you are not controlling the thrust, but moving the set point- the software determines how much thrust is needed for the vehicle to achieve the new set point.

The further you move the set point, the greater the response, so it may feel like manual piloting, but you are still moving the set point.

Mission Specialist Defender
Using Auto Modes
Version:  A-1.00.00

Page 8 of 18
Auto Mode Example

Auto Heading Operational Example.

Rotate the joystick to yaw right say 10 degrees, the set point moves right to 42.9 and the vehicle turns right, which brings the vehicle to the new heading and as it turns, the set point moves back to the middle. The vehicle settles when its heading matches the new set point of 42.9.

You can see this graphically in the two illustrations in the slide above.

Mission Specialist Defender
Using Auto Modes
Version:  A-1.00.00

Page 9 of 18
Jog Controls

In addition to using the joystick to change the set point, you can use the jog controls, The Jog Controls move the set point a fixed increment with each click. The increment can be defined by the operator.

You can open the Job Controls window from the Control Bar on the left of the screen.

With Auto Heading on, click on the arrows surrounding the circle to move the set point for the heading to yaw left or right.

With Auto depth on, click on the up or down arrows to move the set point for the depth to decrease or increase the depth.

Mission Specialist Defender
Using Auto Modes
Version:  A-1.00.00

Page 10 of 18
Keyboard Arrow Keys

The keyboard arrow keys can also be used to change the set point:

  • Shift Left Arrow Yaws the vehicle to its Left
  • Shift Right Arrow Yaws the vehicle to its Right
  • Shift Up Arrow Decreases the vehicle's Depth
  • Shift Down Arrow Increases vehicle's Depth

The increment is the same as used for the Jog Controls.

Mission Specialist Defender
Using Auto Modes
Version:  A-1.00.00

Page 11 of 18
Xbox Elite D-Pad

Using the Xboc Elite. The Xbox Elite D-Pad can also be used to change the set point. The step shift button must be pressed. Then press the corresponding area on the D-PAd to either decrease depth, increase depth, yaw left or yaw right.

Mission Specialist Defender
Using Auto Modes
Version:  A-1.00.00

Page 12 of 18
Emergency Stop

An emergency stop feature is available. If you need to stop the vehicle while it is under Jog Control motion, tap or displace the joystick. This will move the Station to where the vehicle is currently, resulting in station keeping at this location.

This can be helpful if the Jog Control amount is accidentally set too high, or when working in low visibility.

Mission Specialist Defender
Using Auto Modes
Version:  A-1.00.00

Page 13 of 18
Additional Notes

Each Auto Mode is independent and only controls its specific degree of freedom. Auto heading will maintain the vehicles heading, but if there is current, the vehicle will be pushed downstream by the current. To maintain location, Dynamic Positioning is required. Dynamic Positioning will be covered in another lesson.

You can use more than one Auto Mode at a time, but Auto depth and Auto altitude are mutually exclusive.

Mission Specialist Defender
Using Auto Modes
Version:  A-1.00.00

Page 14 of 18
Runaway Set Point Warning

Reminder! You control the set point.

Why is this important?

It is possible to move the set point to a value that is impossible for the vehicle to achieve.

How?

Imagine you are in Auto Depth mode near the bottom. If you command the vehicle to dive, i.e. move the set point down, it is possible to keep moving the set point until it is deeper than the bottom. The vehicle of course will stop when it hits the bottom, but the set point may be below the bottom and if you are not paying attention the vehicle will keep trying to achieve that set point.

Mission Specialist Defender
Using Auto Modes
Version:  A-1.00.00

Page 15 of 18
Recovering from a Runaway Set Point

Now the vehicle is working harder and harder to catch up to the set point, but it cannot. If you now change the depth to surface, the set point will move towards the surface. Depending on how far down you drove the set point, this could take quite a while before it is back above the bottom depth.

In this case it may be better to turn auto depth off and back on and then back on again, which will reset the set point to the current depth of the vehicle immediately.

Mission Specialist Defender
Using Auto Modes
Version:  A-1.00.00

Page 16 of 18
Auto Modes Summary

Auto modes take over the Pilot’s job of trying to manually maintain the Heading, Depth or Altitude, Pitch and Roll.

Auto modes can be switched on and off independently and at will.

The pilot can change the set point easily and at any time to command the vehicle to a new heading, Depth or Altitude, Pitch and Roll.

However remember, Pilots should monitor the set point while operating in an auto mode to prevent it from exceeding the capabilities of the vehicle.